Monday, June 23, 2014

New pipes and bars

Chris decided to make a complete stainless exhaust.
The rear pipe wraps under then bike and loops around the front of the engine
Here they ar about 90 percent tacked in place. I am stoked to hear these things roar
The yellow turnd needed some new bars. I priced them on line and the cheapest I could find them was over $100 for a set of mustache bars. With an excess of take off bars floating in the rafters I figured I would give it a shot at chopping an old set up
I removed 3" from the center
These are the chopped center and cut off that are going to get used
Roughing them into place on the bike
welded and sanded
Back on the bike

Tuesday, June 10, 2014

Triumph frame chopping time.

The decision has been made to go forward with a stocky rigid. With that in mind Chris welded up some holes holes on the frame.
Deuce cut off everything that could be removed
The old frame faught back with a hidden quart of oil
Chris and Deuce doing a little chinese finger-cuffs on the backbone.
Chris' versio of wet sanding involves a DA & Beast Light
Phil got to cutting out some old axle plates
Christian stopped by for a bit. Perhaps this summer we will see this scoot get hardtailed

Thursday, June 5, 2014

Shovelhead has been marking it's territory

Tore down the top end because the Shovel has been leaking oil like crazy.  Phil was told the motor was rebuilt when he bought it as a basket case.  It appears that it was but they used James gaskets and it sat dry for 6 years.  Either way, tore it down and put Commetic head and base gaskets on it.
The old head gaskets looked alright but as you can see they were leaking a bit.

Phil was able to take off the heads together and not having to remove the rocker boxes is a blessing.

The pistons and jugs looked great, a little suit on the exhaust side of the piston because these heads aren't drilled for two spark pllugs.  As you can see the base gasket was in pieces and completely saturated in oil.

Cleaned all the surfaces and replaced with the new gaskets.  Put it back together and its not leaking at all from the top end.  Now if Phil can just get the oil pump to stop leaking!

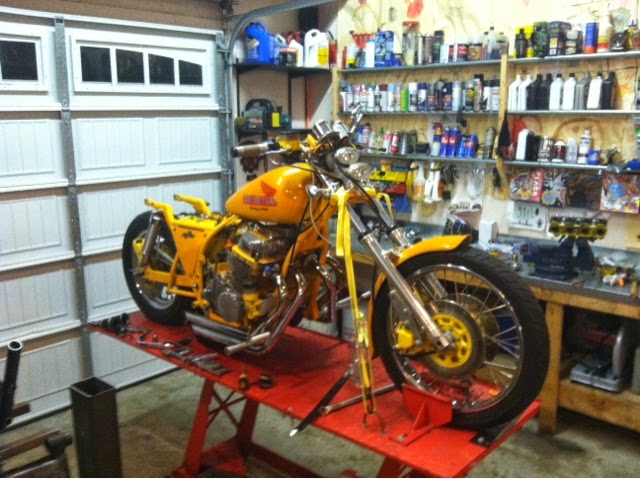
Yellow turd

So to start it off, Deuce and Phil were screwing around with Chris's tubing bender and successfully bent a 180.  This will come in very handy in the future for a set of crazy ass bars that Deuce wants to fabricate.
Deuce working the carbs that came out of the Yellow Turd, we know they are not stock 1970 CB750 but we aren't sure what they are just yet.

And here is the newest bike we have affectionately named the "Yellow Turd".  This was probably a badass chop when it was built back in the 80s.  Deuce picked it up because it has a ton of one-off parts on it and its a 1970 CB750.  Whoever built it took a ton of time and did an amazing job in areas and then other areas was just some dumbass shit.  Either way, we are going to put the Lagniappe spin on it and make it cool!

More to come with this beast so stay tuned!

Monday, May 12, 2014

Seat upholstery 101

Chris finalizing some pan hammering that him and Phil did earlier in the week
N
Scribe out a cut line
Trim to fit
Burnish the edges
Test fit the foam
3M Glue it in place then rough cut
Drink 3 beer and talk about how awesome it is going to look when complete
Massage the edges air sanding disc
Rough cut material
Light Coat of 3M on both peice and let dry from 10 minutes. This stuf only gives you one shot to get it straight.
Trim Excess
Stick your finger in it
Complete!

Friday, May 9, 2014

Chris's chop is off the rack!

A last minute trim of the clutch lever to clear the tank. 
Some little touches and tuning left. Upholster the seat pan, hook up the front brake and adjust the rear brake and this thing will be at the next bike night!

Sunday, May 4, 2014

Busa brake caliper on a Virago

We created a template for the new adapter plate on the backside of a PBR carton of course.
We used one clamp to keep the wheel from spinning and another clamp that held the caliper exactly where we wanted it.

Chris cut off the bottom mounting hole and repositioned it in the new location against the caliper.

Chris made the adapter plate from 3/16 steel and we test fitted it.

Again we used some pieces of the PBR carton to space the pads out for mock up.  Is there anything you can't do with a PBR carton?!

Chris beveled all the edges and cleaned everything up in order to weld.

It took a couple tries to get the TIG to weld the cast aluminum correctly.  We preheated the part in the oven at 350 for about 20 minutes.  Once we preheated it the TIG could maintain a good puddle and the weld was successful.

Here is a picture of the inside pass,  we unbolted the adapter plate that was holding everything in place and welded up the other side and the ends.

Chris contoured the adapter to flow better with the caliper and we powder coated everything faux chrome.  It goes well with the polished aluminum lowers.  Now Chris has a 6 piston caliper on the front end of the Virago.  He also went from a dual disc setup to a single in order to open up the right side and not hide the wheel.